Adoro esse carimbo, mas normalmente uso para fazer cartões de Natal. Dessa vez colei na tampa de uma caixa de papel, fica uma embalagem linda para qualquer presente. E apliquei a técnica de reflexo de imagem que vale para qualquer carimbo, ensino aqui o passo a passo dessa técnica e de como fazer a caixa. Se tiver dúvidas, assista a esse vídeo que ensina a técnica do reflexo de imagem.
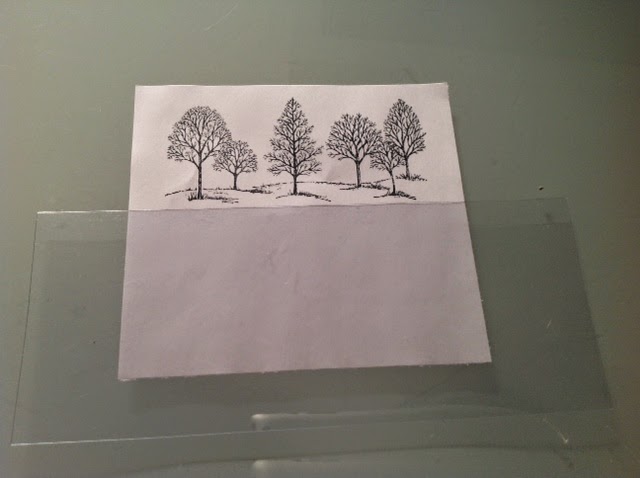
Reflection technique: Stamp the image of your choice on the top part of the paper. The size of the paper base used here was 5 x 4,5 inches.
Técnica de reflexo da imagem: carimbe a imagem que vai utilizar na parte de cima do papel, aqui o tamanho do papel branco usado foi 12,7 cm por 11,4 cm.
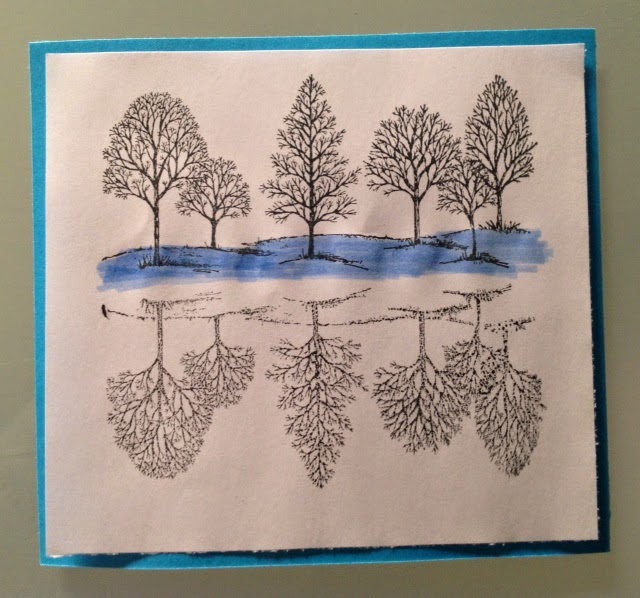
2. For the reflection, cut a piece of acetate and stamp the same image on it. Then flip it with the ink facing the paper, press against it and rub so that the ink is transferred to the paper.
2. Para fazer o reflexo, corte um pedaço de acetato (tem várias embalagens de plástico que podem ser utilizadas), carimbem a mesma imagem, virem de modo que a tinta esteja encostada no papel. Pressione a imagem inteira com o dedo para que a tinta seja transferida.
3. Color it using green for the top and blue for the bottom, that's what gives it the idea of a reflection (the trees would be on the grass and the water below). Cut a lightly larger piece of paper in blue to serve as the base for this panel and glue it to the stamped white paper.
3. Pinte em verde na parte de cima e azul embaixo, isso dá a ideia de que em cima é vegetação e embaixo fica a água. Corte um pedaço de papel azul um pouco maior para dar contraste e monte o painel que será colado na tampa da caixa.
AGORA A CAIXA (BASE):
1. The box will be slightly larger then the panel, but very little. The sides are 1,5 inches. Here is the template. Score on the dotted lines.
1. A caixa será um pouquinho maior que esse painel. Use o molde abaixo. Dobrar nas linhas pontilhadas.
2. Corte onde estão os XXX e cole como indicado.
3. IMPORTANT: the only difference between the bottom and the lid is that the lid needs to be a tiny wider on all sides so that it fits on the top. Just add 1/16 to all sides. On the template below you will see red dotted lines, these are the lid lines, notice that all are wider. In this case I cut the sides using paper punches.
3. IMPORTANTE: a única diferença da tampa é que ela precisa ser um pouquinho mais larga, cerca de 0,2 cm senão não vai fechar. É só diminuir no sentido indicado abaixo, o que corresponde às linhas vermelhas. O papel é do mesmo tamanho, apenas os lados são menores, veja o sentido das setas. A minha tampa eu cortei nos lados com cortador de papel.
4. Glue the panel on the top and that's it!
4. Cole o painel na tampa e pronto, caixa finalizada!!


.jpg)


Linda caixa!!! O passo a passo explica perfeitamente.
ReplyDeletePaula Coelho