Wednesday, December 30, 2015

Pastel Painting technique / Técnica de pintura com giz

I came across this technique yesterday and oh my GOD! I fell in love with it. It's so simple and turns out beautifully. Here are the results and right bellow, the step by step tutorial on how to color your stamps with pastels. My inspiration came from Petty Bennet, to check out her blog, click here. Hope you have fun!!

Aprendi ontem essa técnica de colorir com carimbos e giz no blog de Petty Bennet, fica lindo!!! Amei e já fiz os cartões abaixo. Para aprender, o passo a passo vem logo depois das imagens. Divirta-se!


TUTORIAL / PASSO A PASSO

1. Ink your stamp using Versamark, then apply the color in circular motion using your sponge daubers. You can use different colors if you want to add a shade effect, here I didn't.

1. Carimbe sua imagem em papel branco usando Versamark ou qualquer marca de tinta utilizada para "embossing". Depois aplique a cor em movimentos circulares até atingir a cor que quiser. 


2. To clear it up and remove and excess, swirl over the colors with a cotton ball (not the white or it will smear) and you're finished.

2. Por fim, limpe de leve (só em cima da área colorida) com uma bolinha de algodão. É isso!


ONE LAST TIP: instead of using double-sided foam tape I learned with Jennifer McGuire to use craft foam. It leaves your die cut more even. You can use your cutting machine, here is how I did mine. If you want to check Jennifer's blog, click here, she is one of my favorite stamping masters! She has a great YouTube channel too.


Tuesday, December 29, 2015

Box with creative lid / Caixinhas com tampas criativas

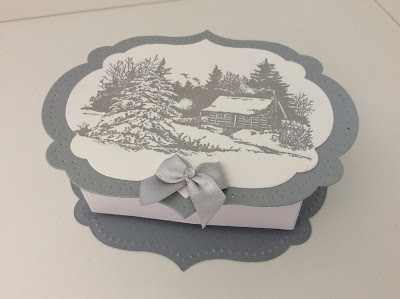
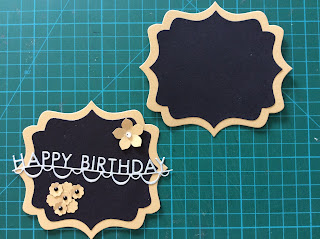
I'm always looking for a different way to make my boxes. This is a very simple technique using framelits, whichever one you have. All you need to do is to play with your stamps and create a pretty scenery, make a box that fits within the framelit area and glue them together. Below these pictures you will find a tutorial.

Eu estou sempre procurando maneiras criativas de fazer caixas de papel e essa técnica é bem simples e faz grande diferença. Ao invés do quadrado básico, basta cortar uma página de papel no formato que quiser e colar em cima e embaixo. Depois das fotos você pode ver um passo a passo.


TUTORIAL / PASSO A PASSO

1. Cut the paper in the shape you want. For these boxes I used two different framelits: Stampin'UP labels collection and Sizzix 5P fancy framelit die set. I used two sizes so that I would have a contrast, also because it looks really nice on the lid. This one was made using the two largest (Sizzix).

1. Corte o papel no formato que quiser que seja o topo, faça o mesmo para a base. O papel que eu uso não é muito grosso, por isso uso duas camadas. Também fica bonito na tampa. 


2. Embellish the lid only and create a scenery.

2. Crie o cenário que quiser utilizando vários materiais decorativos.


3. Make your box in a size that fits within the framelit area. In this case mine measure 3" by 2-1/2 and 1-1/4 height. I actually thought it was a bit large, so I will make it smaller next time. Just use your rule to find the right size. This is just a regular rectangle box. Glue the lid and base and close the box, easy as that!!

3. Faça uma caixinha que caiba dentro da forma. Nesse caso eu até achei depois que ficou grande, as próximas ficaram menores. Cole e pronto!


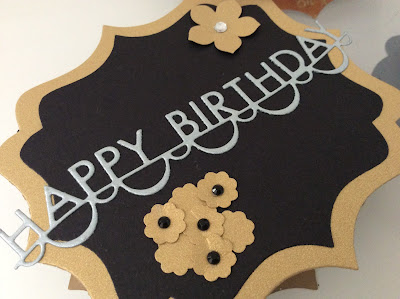
Here, the sceneries in detail.
Aqui, os cenários em detalhe.


This one uses the Stamping' UP labels collection.


Friday, December 18, 2015

More Christmas boxes / Mais caixas de Natal

I thought I was done with my gift box making, but I was wrong!! Made these three last night for the last-minute gifts I bought (the parties are endless!!), this is how it is in Brazil. :)

Achei que tinha terminado minhas caixas de presente, doce ilusão! Essas eu fiz ontem à noite para os últimos presentes (cada dia aparece uma ova festa).


Christmas candles / Velas de Natal

Candles are very versatile and using this simple technique you can transform a white blank candle into anything you want by transfering an image to it. To see how you can do it, check out this video tutorial by Logan. You can also do it by printing on tissue paper and doing the same technique. For this option, click here and watch Heidi's video. These are going to be Christmas gifts.

Quem não gosta de velas? Aplicando essa técnica simples você pode usar a imagem que quiser e transformar uma vela branca de qualquer tamanho. Se quiser aprender como se faz, clique aqui para assistir a um vídeo passo a passo. Essas eu fiz para dar de presente de Natal.


Tuesday, December 15, 2015

Victorian box / Caixinha Vitoriana

I believe this is my last handmade Christmas gift this year. I am a fan of the Victorian age an and this is by far my favorite style. For this I used 3 different papers and the image is from Graphic 45 Gilded Lily cardstock. And pearls, of course!!

E assim acabo de fazer meus presentes de Natal deste ano. Amo o estilo Vitoriano, é o meu favorito de longe! Aqui usei uma caixa de MDF e a cobri com diferentes papéis, dentro e fora. Acrescentei umas flores e muiiiiitas pérolas. :)


Monday, December 14, 2015

Rustic Christmas cards / Cartões de Natal rústicos

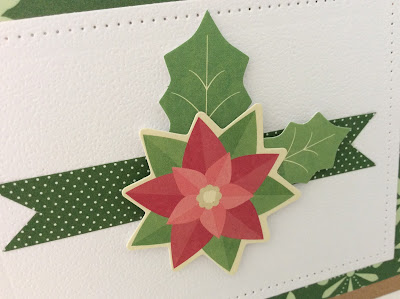
Enough of shine and sparkle, my last Christmas cards of 2015 are very rustic in style. I must say I love these colors.

Depois de abusar de brilho Natalino, optei por um estilo rústico para finalizar meus cartões deste ano. Gosto muito desse jogo de cores mais fechadas. Agora é só dar a quem de direito. :)


Related Posts Plugin for WordPress, Blogger...
Pin It button on image hover